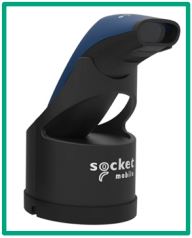
Pre-requisite – Ensure that “support for BLE peripherals” is configured on the Lightspeed back office for the POS device
1. Plug the power cable that comes with the stand into the bottom of the stand and plug the other
end of the cable into a power source.
2. Unbox the scanner, remove the label on the front of the scanner and place it onto the stand (the
power light on the left-hand side of the scanner should beginning flashing orange - to indicate it is
charging)
3. Hold down the power button on the front of the scanner for 1-2 seconds until you hear a beep
tone. After a further 1-2 seconds the Bluetooth icon will begin flashing blue.
4. Scan the barcode below for iOS mode:
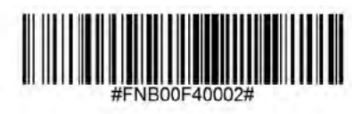
5. Wait for 15 seconds then scan barcode below for ‘always on’ mode
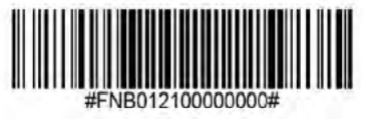
6. OPTIONAL: Wait for 5 seconds then scan barcode below for ‘auto-scan’ mode.

7. Go to settings on the iPad > Bluetooth > turn on Bluetooth (if not already on) > press on the
device called “Socket S740 [XXXXXX]”. If you don’t see the name then please turn Bluetooth off and
back on again. You can also try powering the scanner off and on again too. (Note: The “XXXXXX”
relates to the serial number on the back of the scanner, this is how you can identify which scanner
is connected to which iPad.)
8. As soon as it says connected you can exit settings by pressing the home button. The Bluetooth
icon should stop flashing and turn to a solid blue. This indicates it is connected.
9. Open the Lightspeed POS application again, login and try scanning an item. If it fails, please
check that the barcode exists in the item database.
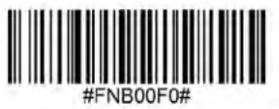
Note: If you have any issues then please ring out support desk on 020 4505 3555, they may require
you to use the barcode below. DO NOT USE IT IN ANY OTHER CIRCUMSTANCE.
Comments
0 comments
Please sign in to leave a comment.