Printer setup Epson TM-U220
- The first step is to change the IP address on the PC so it can browse to the IP address of the printer.
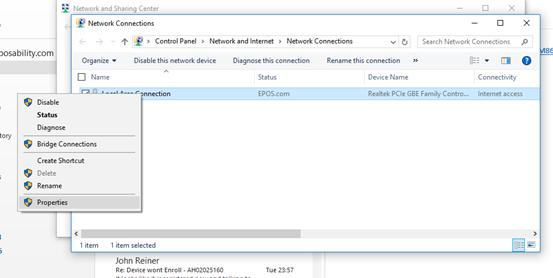
By right clicking on the internet/Wi-fi icon on the bottom right hand side of the taskbar. Click onto “Open network and sharing center”.

- You will then get directed to this page. Click onto “Change adapter settings”

- The next step would be to right click “Local Area Connection” and click onto “Properties”.
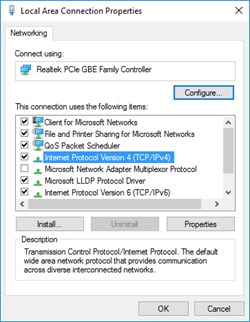
- You will then be directed to the page below, double click onto “Internet protocol version 4 (TCP/IPv4).
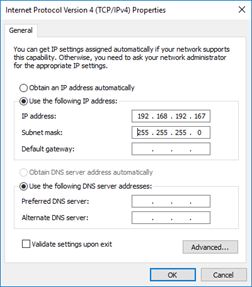
- Tick “Use the following IP address” as this will you to input an IP address. You will need to input the following:
IP address: 192.168.192.167
With regards to the subnet mask it will automatically input itself depending on what the IP address is.
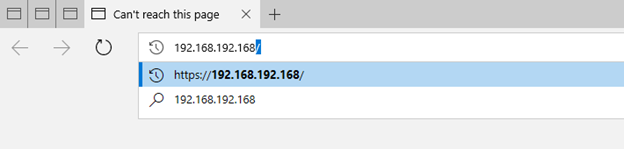
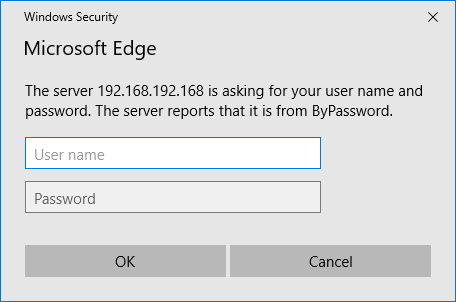
- Once the printer is connected to the computer browse out to 192.168.192.168
- Input the username and password (epson and epson) Or (epson and the printers serial number)
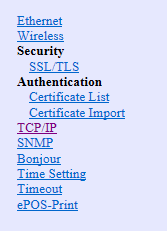
- Navigate to the TCP/IP section
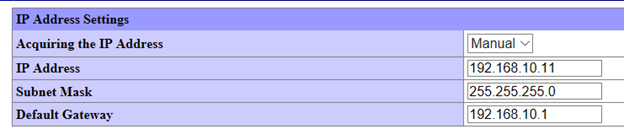
- Change the "acquiring IP Address from Manual to Automatic" in the Dropdown.
- Click “Send” at the bottom of the page and then reset - Once complete this is now ready for DHCP mode.
Comments
0 comments
Please sign in to leave a comment.