Discounts reduce the price of an entire order or individual items in the order on the POS.
The Back Office allows you to add and edit discounts that may be applied by employees on the POS. After you have created the discount on the Back Office, you’ll need to assign it to the appropriate menu and POS device. Moreover, you can also set user permissions so only certain POS users have the ability to apply a discount on an order.
By adding a discount button to a corresponding menu, the discount will be visible and on the POS.
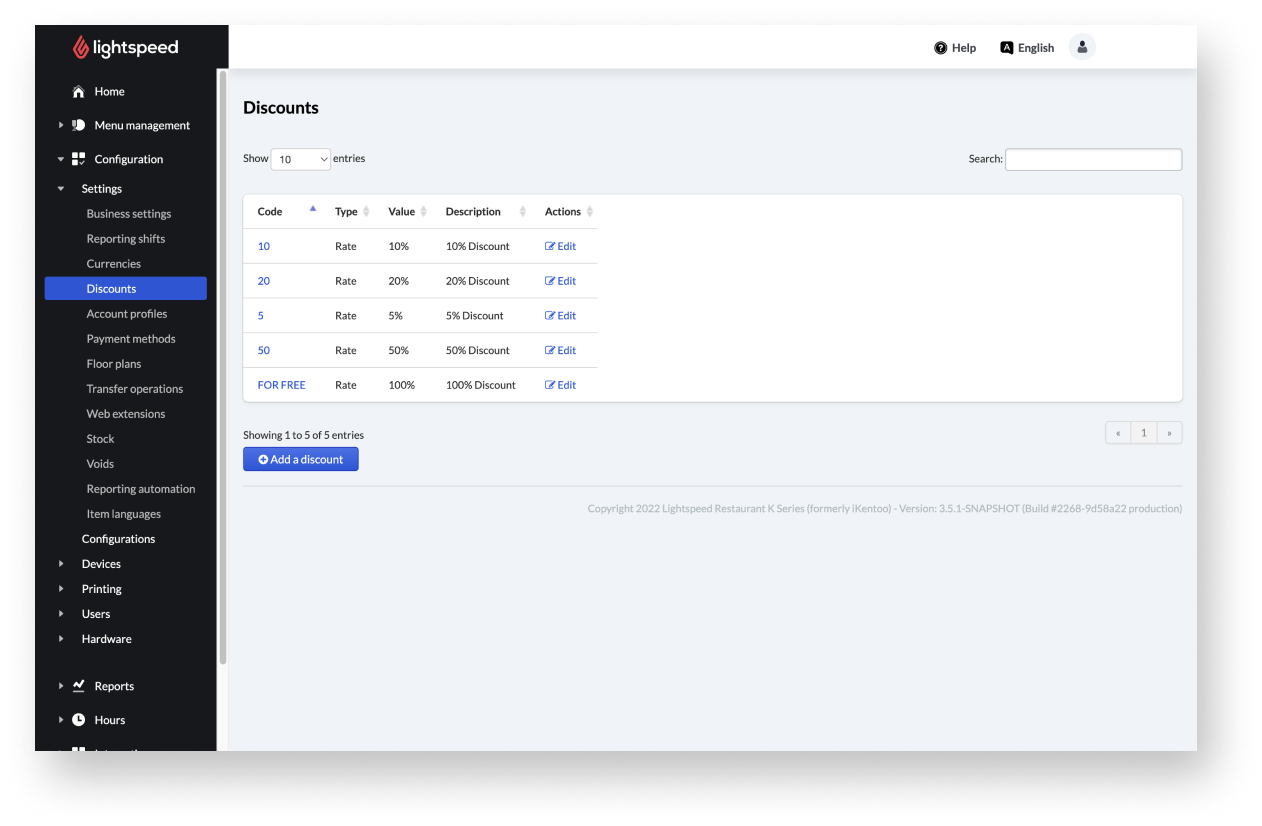
Adding discounts
You can add discounts from the Back Office that apply to customers or employees on the POS.
Another option is adding discounts by generating QR codes. These codes allow users to receive a discount by just scanning this code. A scanner is a prerequisite for this method.
A discount can be given as a percentage or as a currency unit and applied to the entire order or individual items in the order.
Add a discount
Add all discounts to your Back Office that you would like to provide to your customers or employees on the POS. Add a discount button afterward to use the created discounts on your POS.
- Log in to the Back Office with your account credentials.
- From the navigation menu, select Configuration > Settings > Discounts.
- Select Add a discount.
- Apply the required information for the discount:
- Code: Enter the discount code
- Type: Select the discount type.
- Rate: Enter the discount rate.
- Description: Enter a significant description
- This discount denotes wastage: Activate, if required.
- Group: Add a new discount group or select an existing group from the drop-down menu.
- When you are done, select Save.

Discount settings
| Setting name | Description |
| Code | A unique discount code that appears on the POS. |
| Type: Rate | The discounted amount in percent, such as 20%. |
| Type: Amount |
The discounted amount in the currency unit, such as 20€. Note: Please update all devices to app version 4.1. Or higher to use the discount by amount feature. |
| Rate |
Discount in numbers. Depends on what was previously selected.
|
| Description |
Precise discount details, such as “employee discount”. |
| This discount denotes wastage |
When activated, the discount on the item is given due to defectiveness. For instance, items before the expiration date. |
| Group |
You can organize your discounts into groups to make them easier to find on the POS. For example, you could create groups like "Employee Discounts," "Holiday Discounts," etc. You can select an existing group from the drop-down or create a group by entering a new group name. |
When discounts are enabled they show under the actions button on the till, you can also add discounts to the menu as a button.
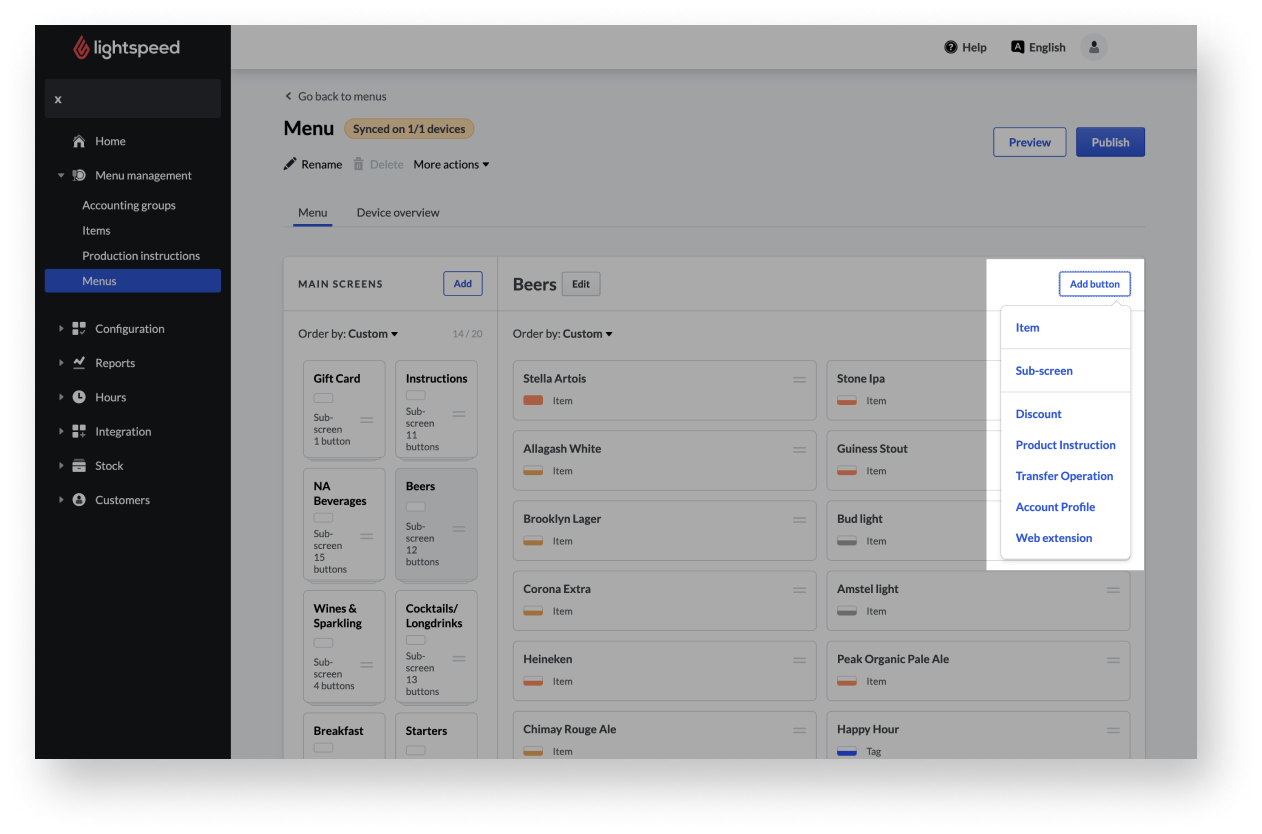
Add a discount button
The discount button makes the previously created discounts visible and usable on the menu.
- From the navigation menu, select Menu management > Menus.
- Select the name of the appropriate menu where you want to create the discount button.
- Select the appropriate top level screen.
- Select Add button at the right side of the page and choose Discount via drop down.
- Choose the discount to use via drop down.
- Select Add button.
Add a discount QR code
After adding a discount, it is possible to add a QR code which allows users to apply a discount by just scanning a QR code.
- From the navigation menu, select Configuration > Settings > Discounts.
- Select Edit.
- Select Enable Discount QR code.
- After enabling the discount QR code, you can apply changes or actions by interacting with the symbols on the page. See the table below for more information.
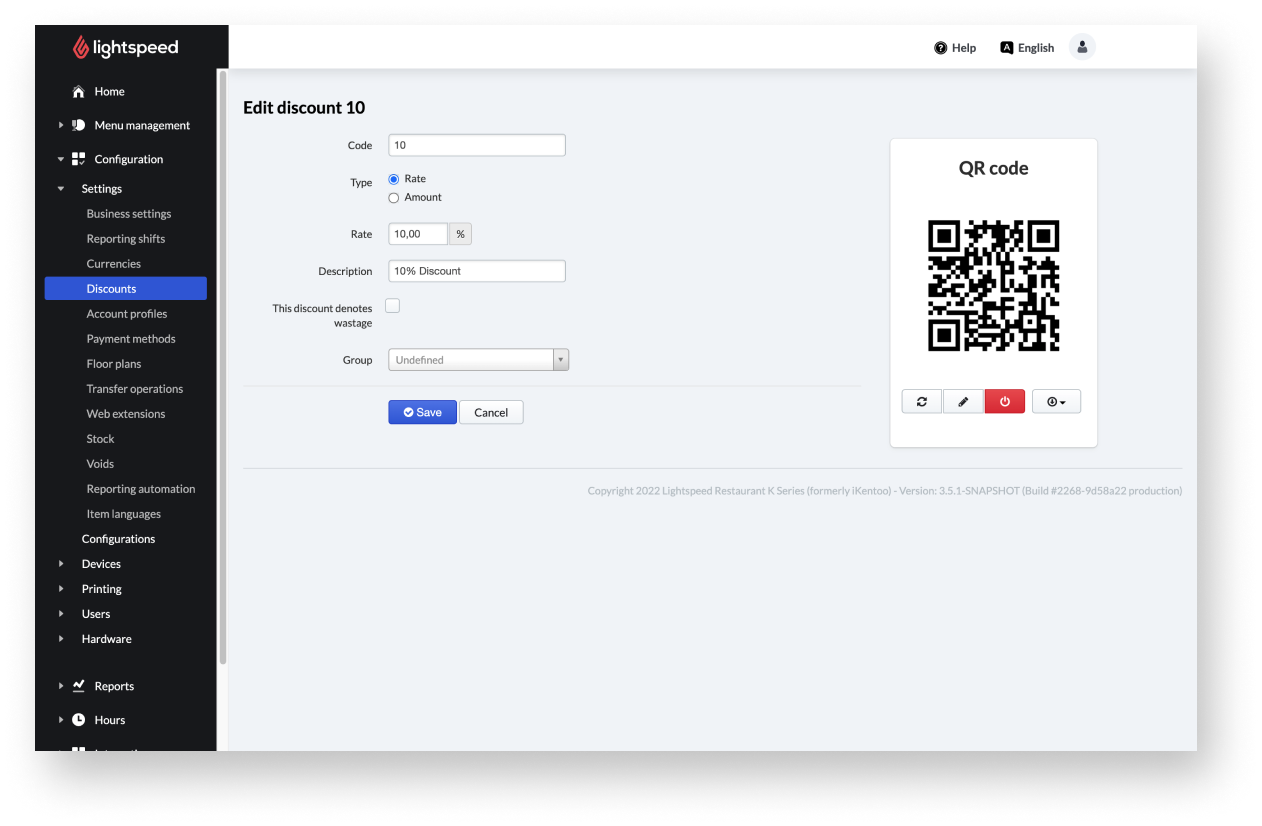
QR code actions
| Setting name | Description |
 Reload Reload |
Generates a new QR code, that will make the current QR code unusable. |
 Pen Pen |
The QR code will be set to a custom code you enter manually. |
 Switch Off Switch Off |
The QR code will be disabled. |
 Download Download |
Export, save and print your QR code. |
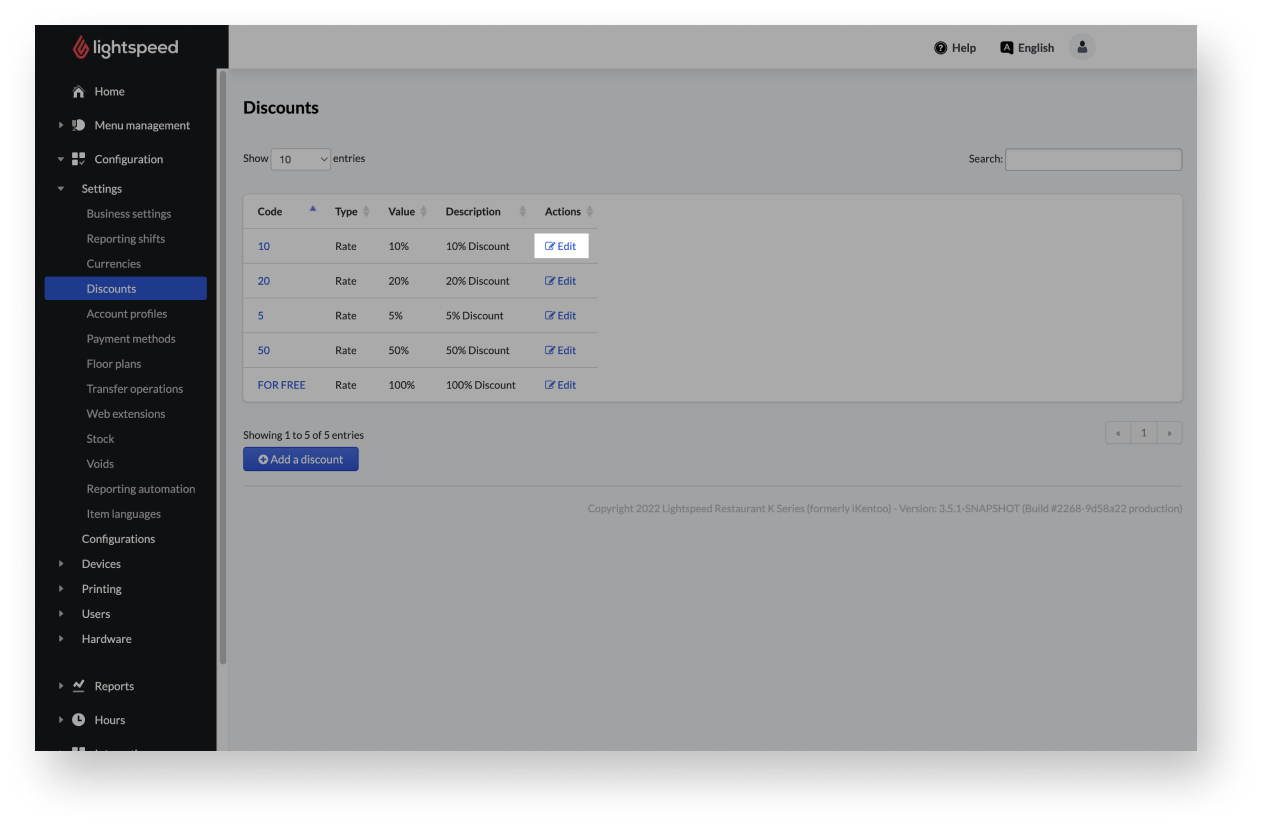
Editing discounts
If you ever need to edit discounts, feel free to do so from the Back Office.
- Log in to the Back Office with your Lightspeed credentials.
- From the navigation, select Configuration > Settings > Discounts.
- Select Edit.
- Make the desired changes.
- Select Save.
Comments
0 comments
Please sign in to leave a comment.