About web extensions
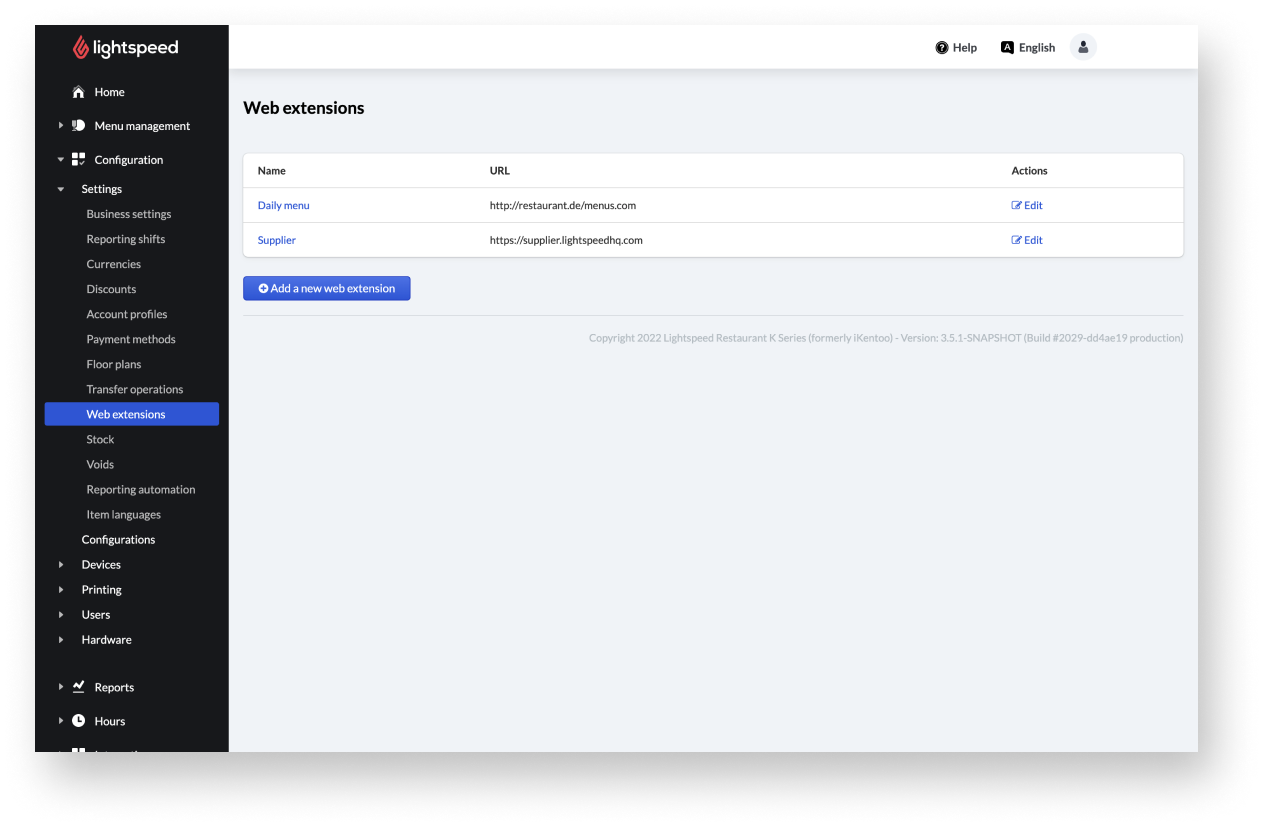
A web extension opens a link or URL in the Restaurant POS app when tapping a linked menu button. When tapping the button, the content of the linked web page will open in a new window within the Lightspeed app. For instance, a web extension could open the menu of the day or a supplier’s order page when an employee activates it.
After adding web extensions in the Back Office, create web extension buttons on your menu so employees can use the extensions on the POS.
Edit existing web extensions, to modify settings or generate a QR code which will then evoke the linked web page on the POS when scanned with a scanner.
Adding web extensions
A web extension is a link or URL that employees can open in the Restaurant POS app by tapping a menu button. Add a web extension to the Back Office and define the extension settings.
After adding a web extension, add a button for the extension to use the web extension on the POS.
To generate a QR code that will then evoke the linked web page on the POS when scanned with a scanner, see Editing web extensions.
Note: Once a web extension is added to the Back Office, it cannot be deleted.
Table of contents:
- Adding web extensions
- Adding a button for the extension
Adding web extensions
Add a web extension to the Back Office and define the extension settings.
- Log in to the Back Office with your Lightspeed credentials.
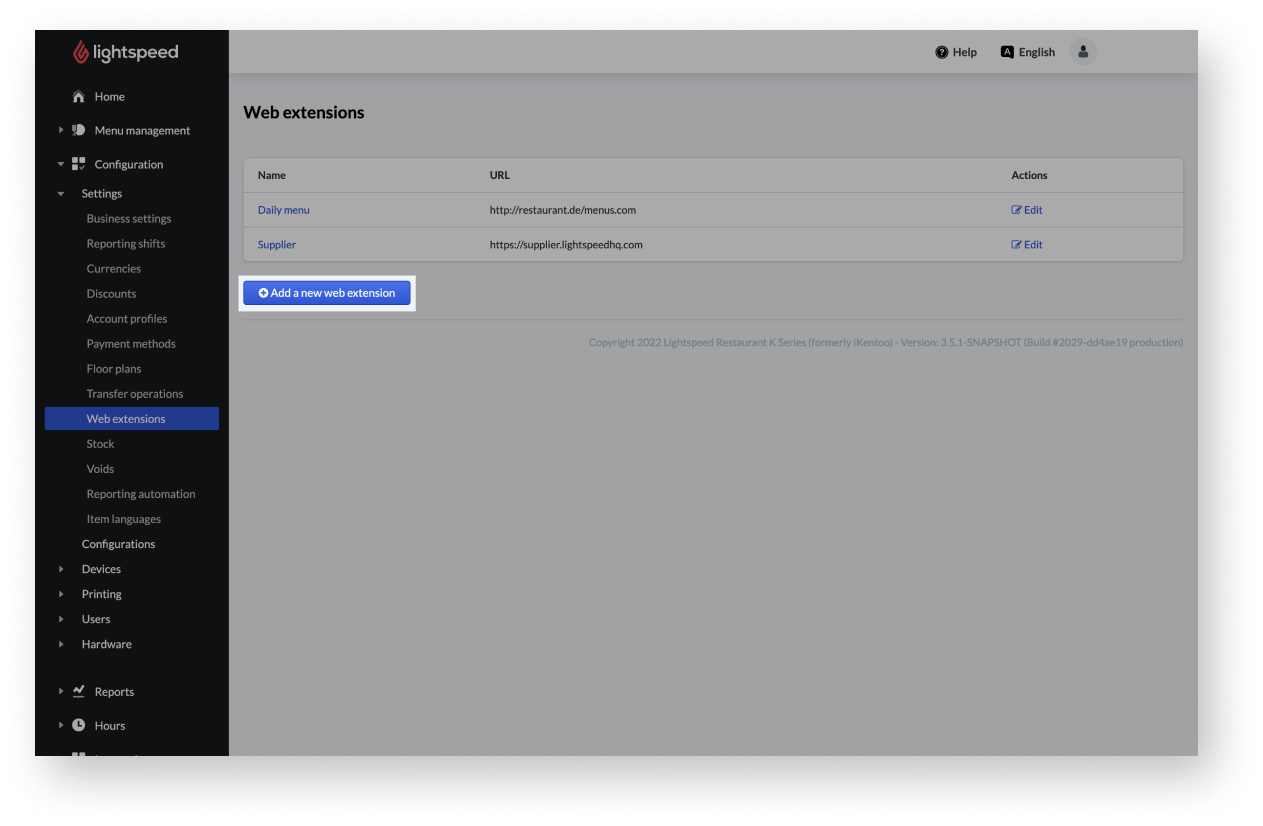
- From the navigation menu, select configuration > Settings > Web extensions.
- Click Add a new web extension.
- Enter the web extension settings.
- Click Save to add the web extension to the Back Office.
Web extension settings
| Setting name | Description |
| Settings |
|
|
Name |
The name of the web extension as it appears in the Back Office and on the POS. |
|
Provide a JavaScript context to the loaded page |
When enabled, the URL opened on the POS can read the information that is pertained to the current account (order). |
|
Supported variables |
Click to open a list of supported variables. They are the parameters that are passed to the web extension. |
|
Use legacy WebExtension engine to render this WX |
When enabled, previous versions of web extensions such as the one running on iKentoo v3 or v4 are taken into account to use current web extensions. |
|
Authentication |
Adding a username and password allows secure access to web extensions. POS users will not have to add the credentials as the credentials are passed directly to the POS. |
|
Content and pages can only be loaded from the following domains |
|
|
Domain name |
The text to reach a particular website. For instance, the domain name for the URLhttps://www.lightspeedhq.com/islightspeedhq.com
|
Adding a button for the extension
After adding a web extension, create a menu button for it to use the web extension on the POS.
- From the navigation menu, select menu management > Menus.
- Click the name of the menu where you want to create the web extension button.
- Select the main screen to add the button.
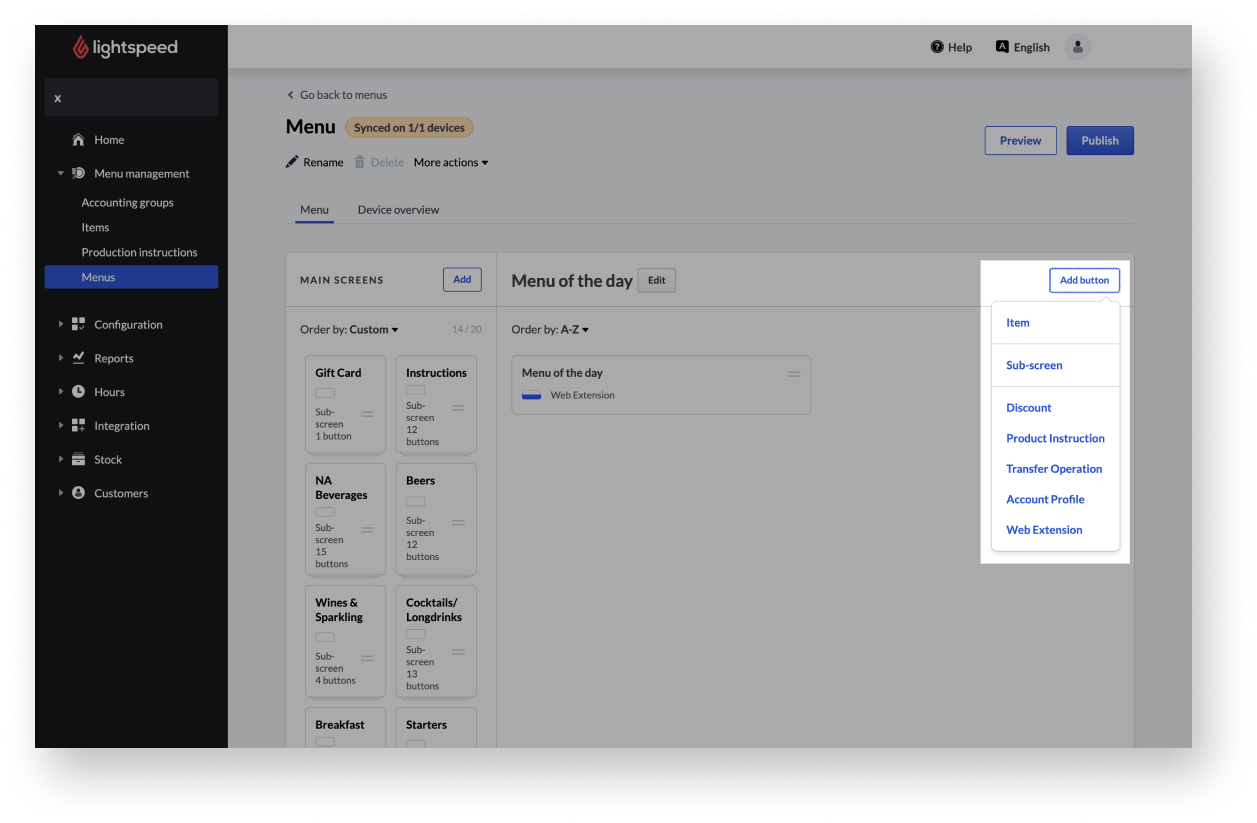
- Click Add button and choose web extension from the drop-down.
- Enable web extensions from the list or search for a web extension and enable it.
- ClickAdd button to add the button to the menu.
Comments
0 comments
Please sign in to leave a comment.