Creating the POS Users.
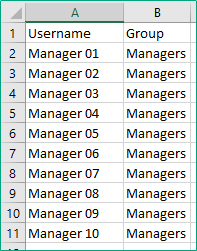
First create an excel document with two columns called Username and Group. When filling out the columns the group will need to be Managers for each user like shown below.
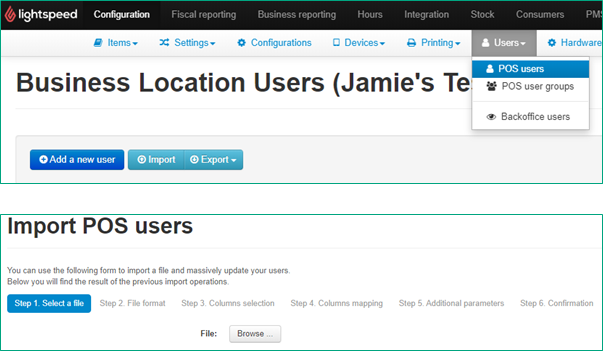
Next you will need to upload the document to the Lightspeed Backoffice, This is done by selecting Configuration along the top of the Backoffice, Clicking on the Users drop down and selecting POS Users. Then select Import and then browse for the file you created.
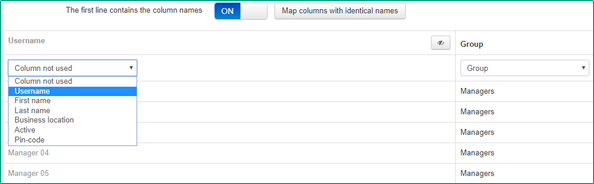
Once you have selected the file you will need to map the columns, First turn on the option ‘The First line contains the column names’ and then map the Username and group columns using the drop downs.
When the columns are mapped select ‘Continue to the Next step’ then ‘Continue’ on the next page and then lastly select ‘Confirm Submission’.
Creating the QR codes.
Now the Manager users have been created you will need to create the QR code for each user. First Go back to the POS users page, find the users you just created and Select ‘Configure’ found under Actions.

You then need to complete the User details section by copying the Username into the ‘IButton ID’ Section and selecting ‘Update’ to save. This is how the manager card is tracked once the card has been assigned to a manager.

Next select ‘Enable QR Code Login’ found next to the User details section. Then select the arrow drop down below the QR code and select ‘Save s PNG image’. This will automatically download the QR code.
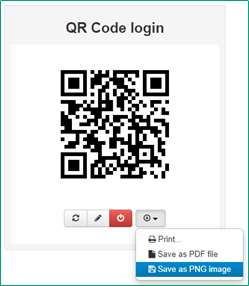
You will then need to rename the file and call it ‘Manager 01’. The file name much match the Username the QR code is for.

Next create another excel document with the columns shown below. The ‘Text (to be printed)’ column will need to match the POS user column. The QR code file name will need to match what you named the QR code file for each user.
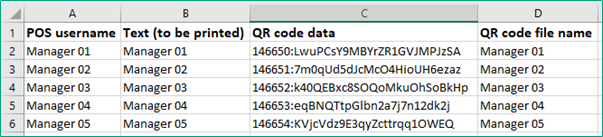
To get the QR code data go back to the ‘Configure User’ page, Select the pencil under the QR code and copy the contents on the box that appears. This will need to be pasted in the ‘QR code data’ column for the relevant user (See the above screen shot).
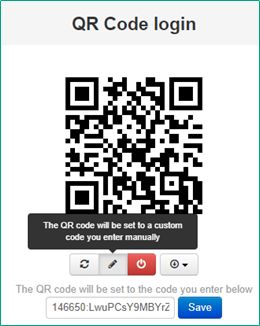
All the steps in the ‘Creating the QR Codes’ Section will need to be done for each POS user you created.
Getting the cards printed.
First step is to put all the saved QR codes into a zipped folder.
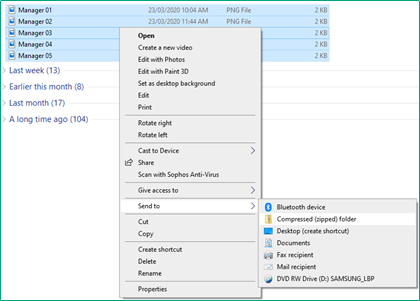
Next step is to get a quote for the manager cards to be printed. This is done by emailing hello@theplasticcardpeople.co.uk, You will need to provide them with all the details needed to get the cards printed correctly. This includes the company logo to be printed on the card, The Zip file containing all the QR codes and the Excel document containing the QR code data and POS usernames.
Please see the below email example.
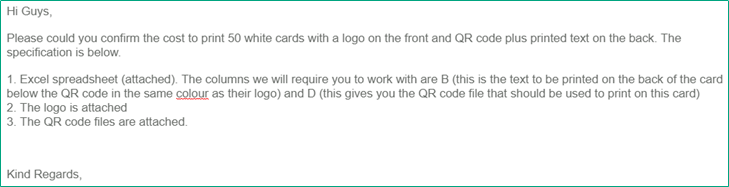
The Plastic Card People will provide you with a Proof copy of one of the cards, this will need to be sent to the client so they can approve it.
Once you have a quote you will need to raise this with the account manager for the site so they can confirm costs with the client and raise an invoice.
Comments
0 comments
Please sign in to leave a comment.