About printing
About printers
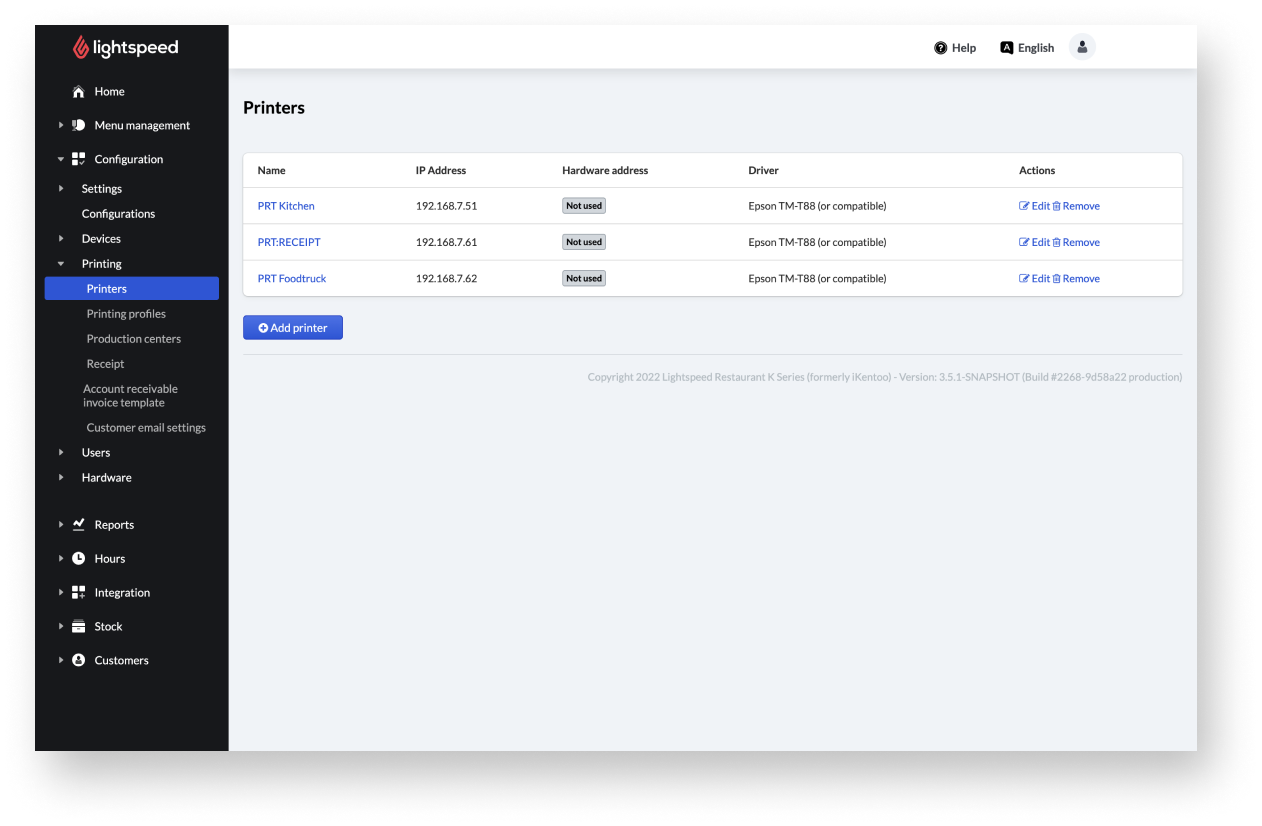
From the Printers section of the Back Office, you can add or edit printers used with Lightspeed Restaurant. From the Back Office, added printers can then be assigned to printing profiles (types of printing jobs) and production centres (a printing destination).
Adding printers
Printers are the hardware used to print documents such as receipts or kitchen tickets from Lightspeed Restaurant. To use printers with Lightspeed Restaurant, you need to configure printer settings from the Back Office.
We recommend that you always register your Epson printers in the Lightspeed Restaurant Back Office with their IP and Mac addresses. By doing this and connecting the printers to your local network, you will ensure that no receipts or tickets are lost in the event of a printer failure. If a printer goes offline for any reason during a transaction, the system will detect this and send the print job to the next available printer.
Adding a printer to Back Office
- From the main navigation bar of the Back Office, go to Configuration > Printing > Printers.
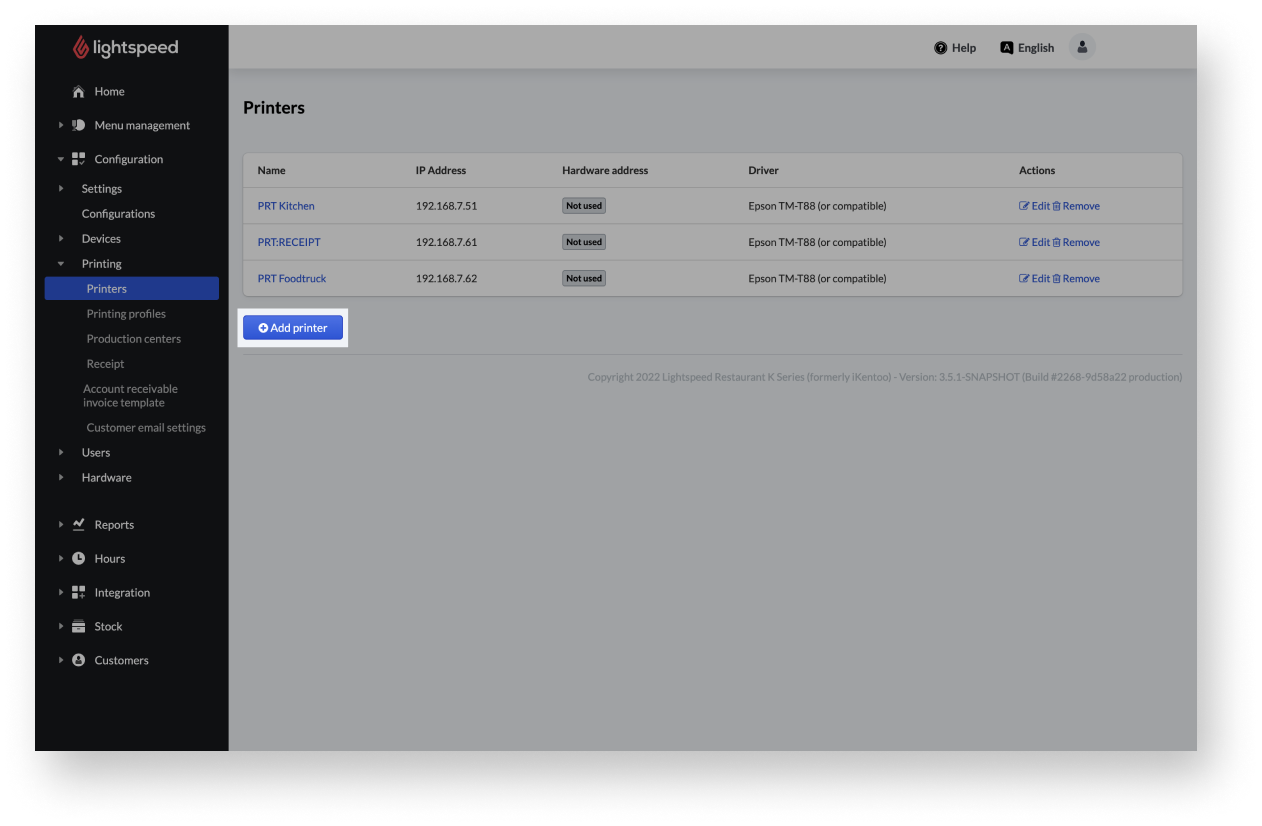
- Select +Add printer.
- Add printer details and information on the following form.
- When you are done filling out the fields, select Save.
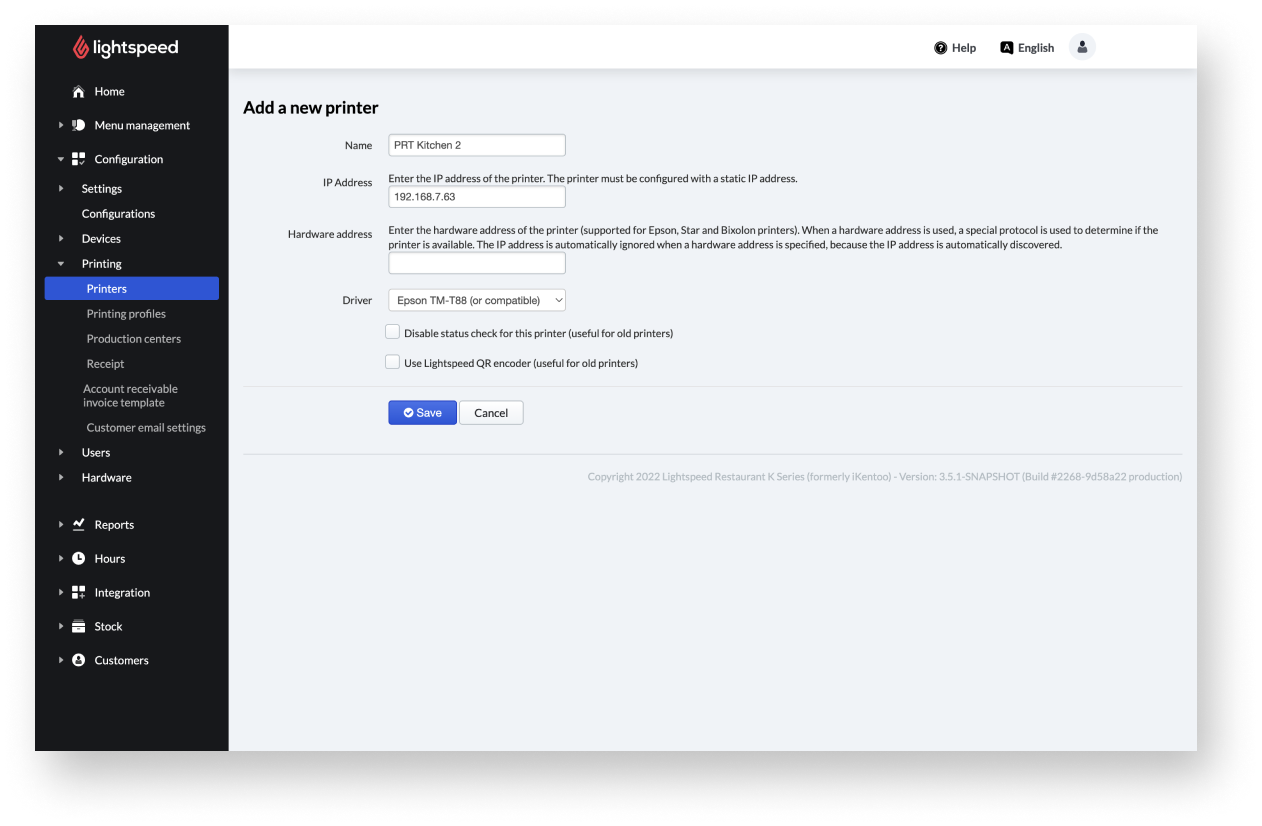
Printer settings
|
Name: |
Choose a proper name for the device, like Starter station or Cocktail bar. |
| IP address: | Enter the static IP address of the printer. |
| Hardware address: | Enter the MAC address of the printer. You will find it on the back or the bottom of the device. |
| Driver: | Select the driver via the dropdown menu. |
| Disable status check for this printer, useful old printers: | Select the checkbox if wished. |
| Use Lightspeed QR code encoder, useful for old printers: | Select the checkbox if needed. |
Comments
0 comments
Please sign in to leave a comment.