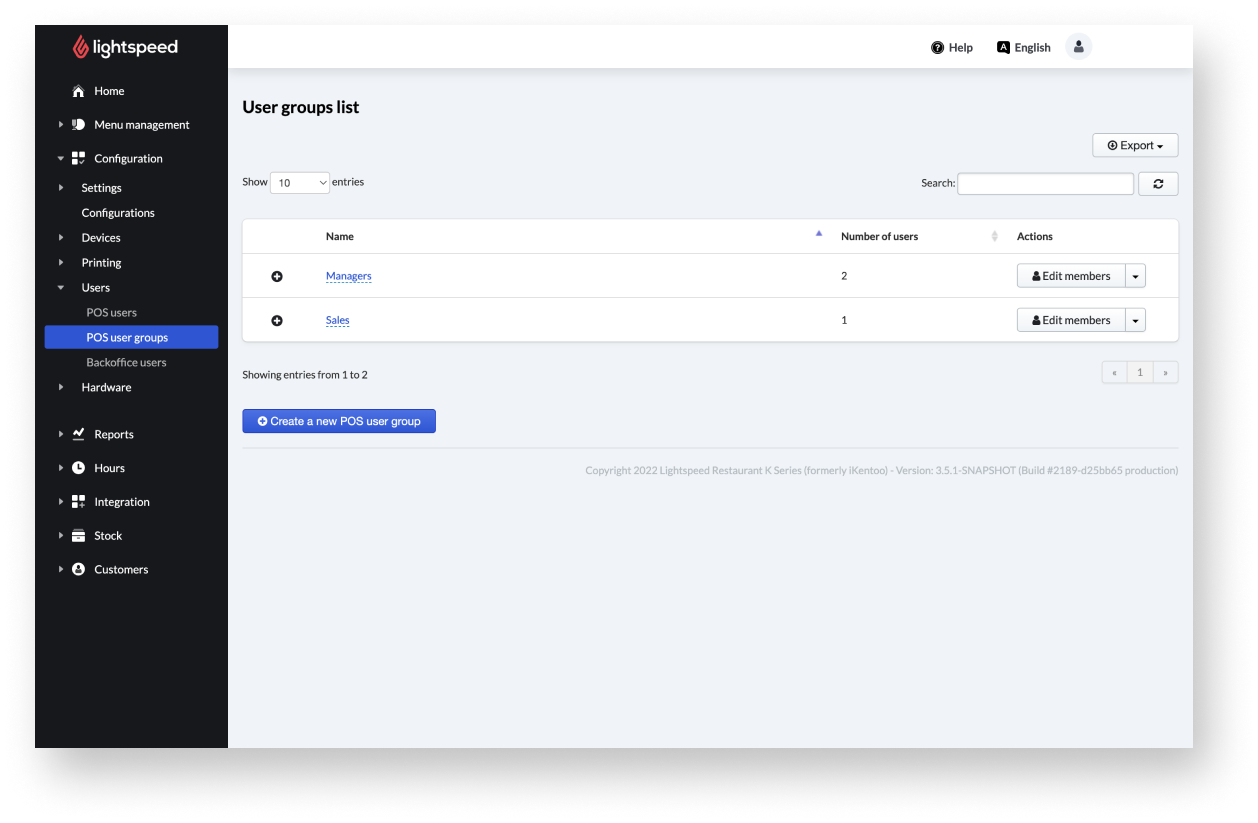
From the Back Office user groups page, you can add and edit user groups. You can assign group roles to groups and assign POS users to groups. User groups allow you to quickly sort your employees’ varying levels of access within the POS. The user groups are only used for POS users.
User groups also save time. Instead of manually adjusting permissions for each user, you can simply assign a user group and its associated permissions, such as “manager” or “bartender.”
Adding POS user groups
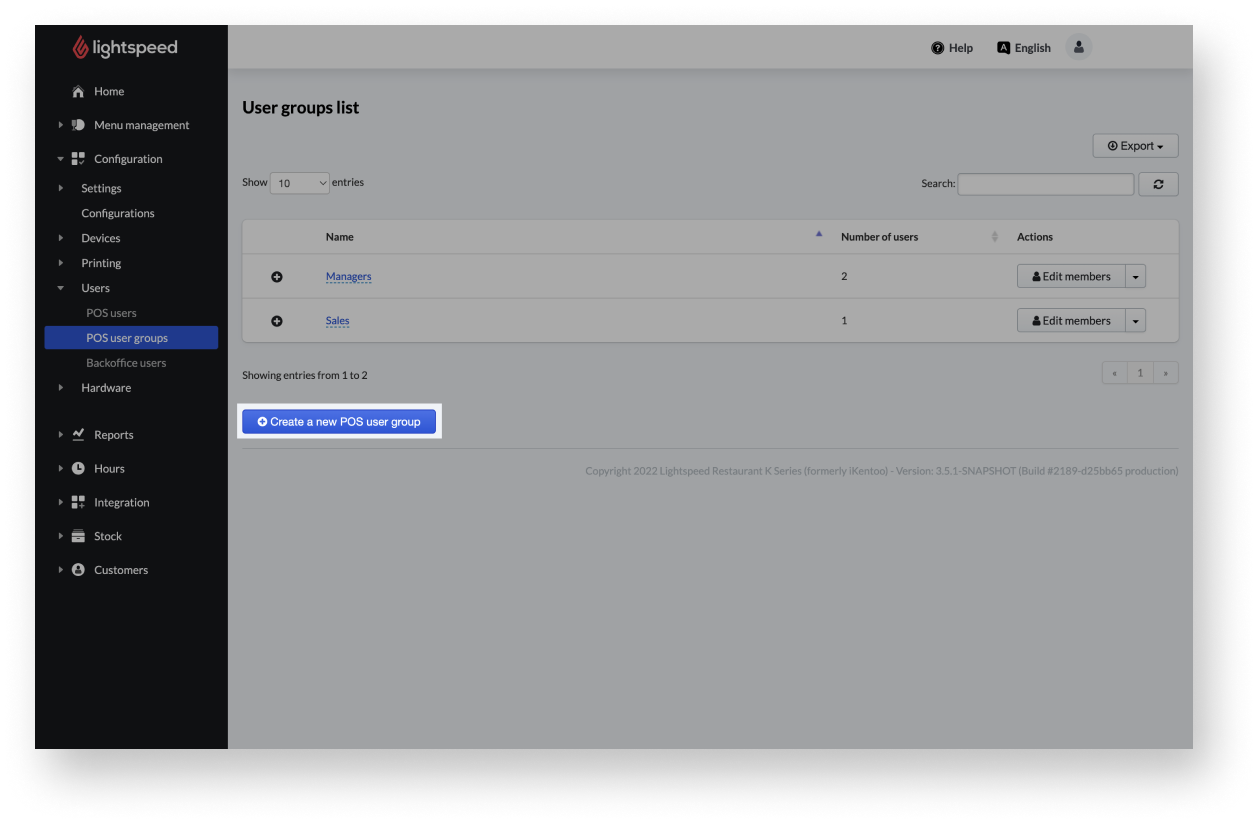
Adding a POS user group allows you to define the name of the group. After adding POS user groups you can make further adjustments, such as adding user groups roles, defining discounts used in this group and tip and money counting settings.
- Log in to the Back Office with your Lightspeed Restaurant account credentials.
- From the navigation menu select Configuration > Users > POS user groups.
- Select Create a new POS user group.
- Enter the new POS user group name.
- Select OK.
Editing POS user group names
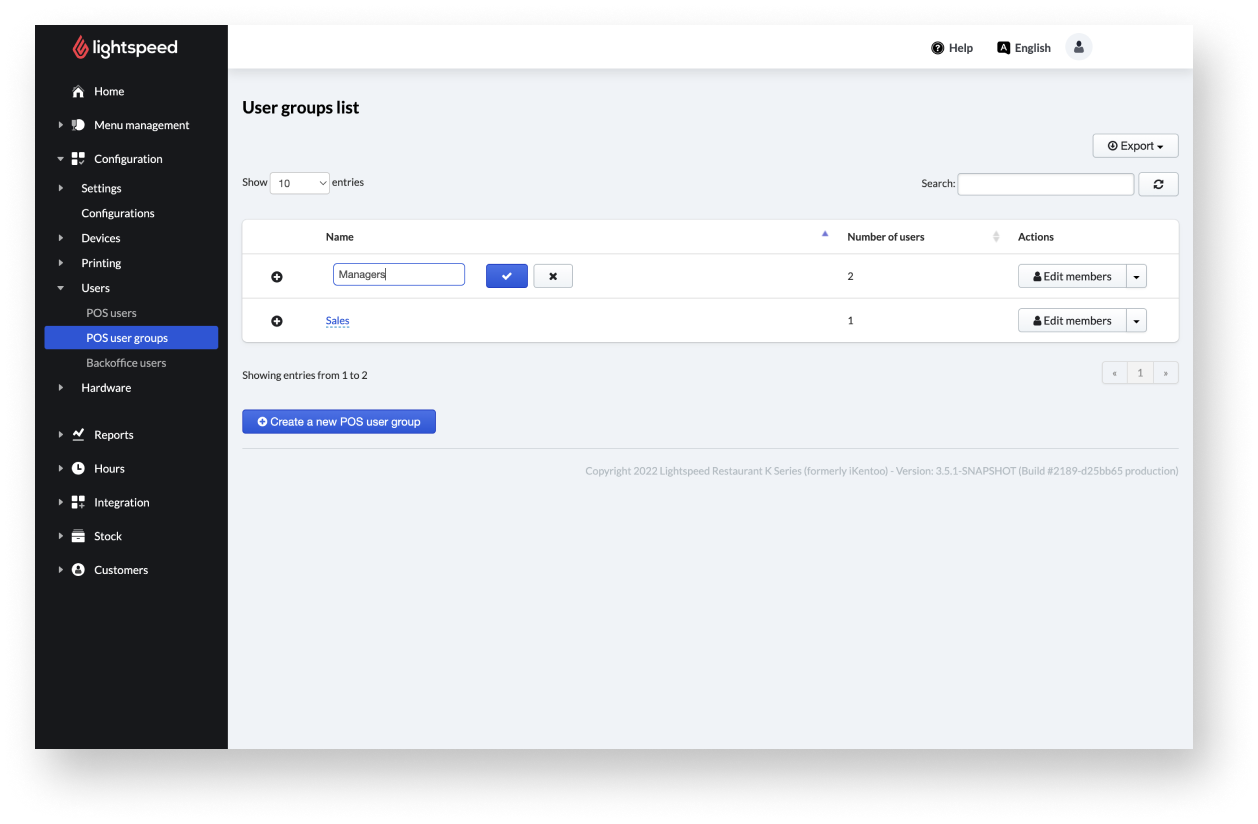
Change the name of the user group via Configuration > Users > POS user groups by selecting the name of the user group. After changing, select the checkmark and confirm the new name.
Adding user group roles
User roles define the permissions and restrictions for a specific user or collection of users in Lightspeed Restaurant. By defining the user roles within a user group, users assigned to the groups will automatically receive the permissions set up for the group.
- From the navigation menu, select Configuration > Users > POS user groups.
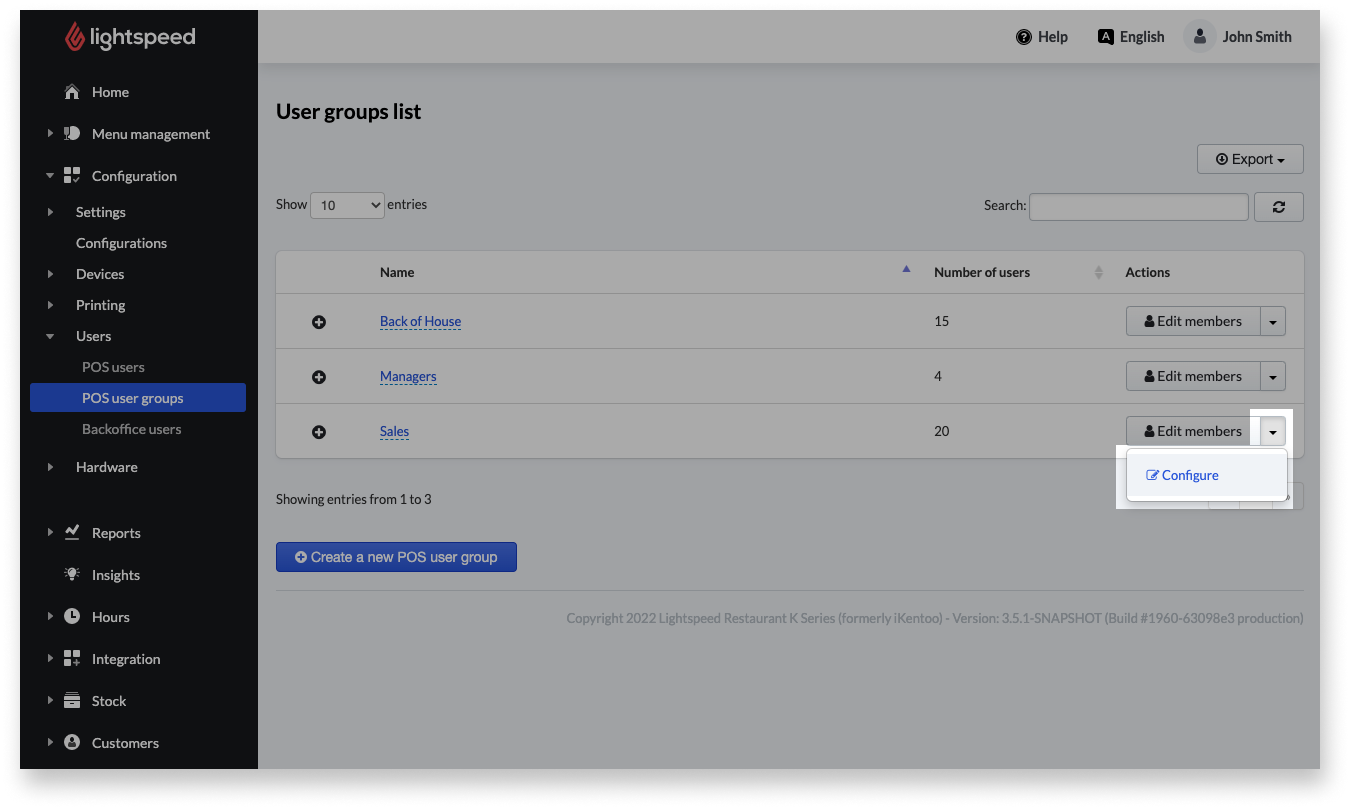
- Select the arrow next to Edit members for a user group you want to modify.
- Select Configure to edit user roles.
- Enable the applicable user permissions for the selected user group.
- Select Save.
User group settings
| Setting name |
Description |
| POS access |
Users in this group are not allowed to login:
Defines if users in this group are allowed to log in to the POS (checkbox unselected) or if users are only allowed to track their shift hours with the POS (checkbox selected). |
| User roles |
- User is a POS manager: The user automatically has all listed user permissions.
- User can print duplicates of a customer receipt: In the POS a customer receipt can be printed as a copy.
- User is in training, transactions aren’t committed: The user can log in to the POS, but cannot make any bookings or payments that would affect day-to-day operations.
- User can send a receipt by email:
The user can send a receipt on the POS to a required email address.
- User can cancel receipts on the POS:
A receipt already created in the POS can be cancelled. For example, customers have decided to stay and have a drink after all.
- User can create an invoice from a customer receipt:
The user changes a receipt to an invoice on the POS. The receipt is then not paid immediately but at a later date.
- User can change the payment method of a customer receipt:
The customer decides at short notice to pay by card, for example, because he does not have enough cash on him. The user can then change this on the POS.
- User can use the time clock to track worked hours:
The user can clock in and out on the POS.
- User can apply an account profile:
The user can add categories.
- User can transfer items from one account to another:
Items can be added to another order.
- User can return items:
Items that have already been sold can be returned on the POS.
- User can open the cash drawer using the open drawer button:
The cash drawer can be opened at any time without a transaction.
- User can recall a closed account into an open account:
The user can change a closed order to an open order.
- User can disable printing manually:
The user can decide for each transaction whether a receipt should be printed on the POS.
- User can cancel items that have been sent:
After the items have already been sent to, for example the kitchen or bar the user can cancel them.
- User has manager rights for table transfers:
The user has all the rights for table transactions, such as moving booked items to another table or cancelling a table.
- User can change the default configuration:
On the POS it is possible to define which POS profile is used by default when logging in. The user can change this configuration.
- User can split accounts:
Multiple customers at a table want to pay separately. The user can divide the order into different receipts.
- User can force gratuity on an account:
The user can add a tip manually to the receipt.
- User can open and close shifts:
The user can open and close a sales period on the POS.
- User can reload the POS configuration:
Configurations are POS profiles that are associated with a specific menu and settings. When changes are made on the Back Office, the user can reload the configuration on the POS to see these changes.
- User can view and manage consumers:
Consumers are customer accounts.
|
| Settings |
- Report access:
Defines the visibility of reports for POS users.
- This group defines the discounts available to its members:
Discounts reduce the price of an entire order on the POS. The members of this group are allowed to give a discount on orders on the POS. All discounts created from the Back Office on the discounts page are available.
|
|
User float settings
Defines tip and cash flow.
|
- Users take their tip in cash at the end of the shift:
Users will receive their tips in cash regardless of the original payment method used to leave each tip. The total cash tip amount due to the user is reported on their User report at the POS and on the Staff report in the back office.
- Allow users to declare tips when clocking out: When clocking out, users will be prompted to self-report, or declare, the amount of tips they leave with at the end of their user shift.
- User tip subtraction percentage:
Percentage automatically deducted from users’ received tips. The deduction amount is reported as "tip discount" on each employee’s User report at the POS.
- Float counting mode:
Controls the behaviour around counting cash floats at the POS:
- Float counting is disabled- The float cannot be counted at the POS and will always be opened with the default amount entered in The float amount when opening the user’s bankfield.
- Float counting is allowed- Users can count and enter the actual float amount or they can accept the default float amount without counting.
- Float counting is mandatory- Users must count and enter the actual float amount.
- The float amount when opening the user’s bank:
The default amount that a user’s float will be opened for at the POS unless they count and enter the actual float amount.
- Enable float management:
Select the cash float or user wallet that will be used for users’ transactions.
|
Assigning users to a user group
By assigning users to a user group, they automatically adopt the predefined privileges so that you can quickly apply roles to several users at once. A user group is a set of predefined privileges that you can use to quickly apply roles to groups of employees.
- Log in to the Back Office with your Lightspeed Restaurant account credentials.
- From the navigation menu, select Configuration > Users > POS user groups.
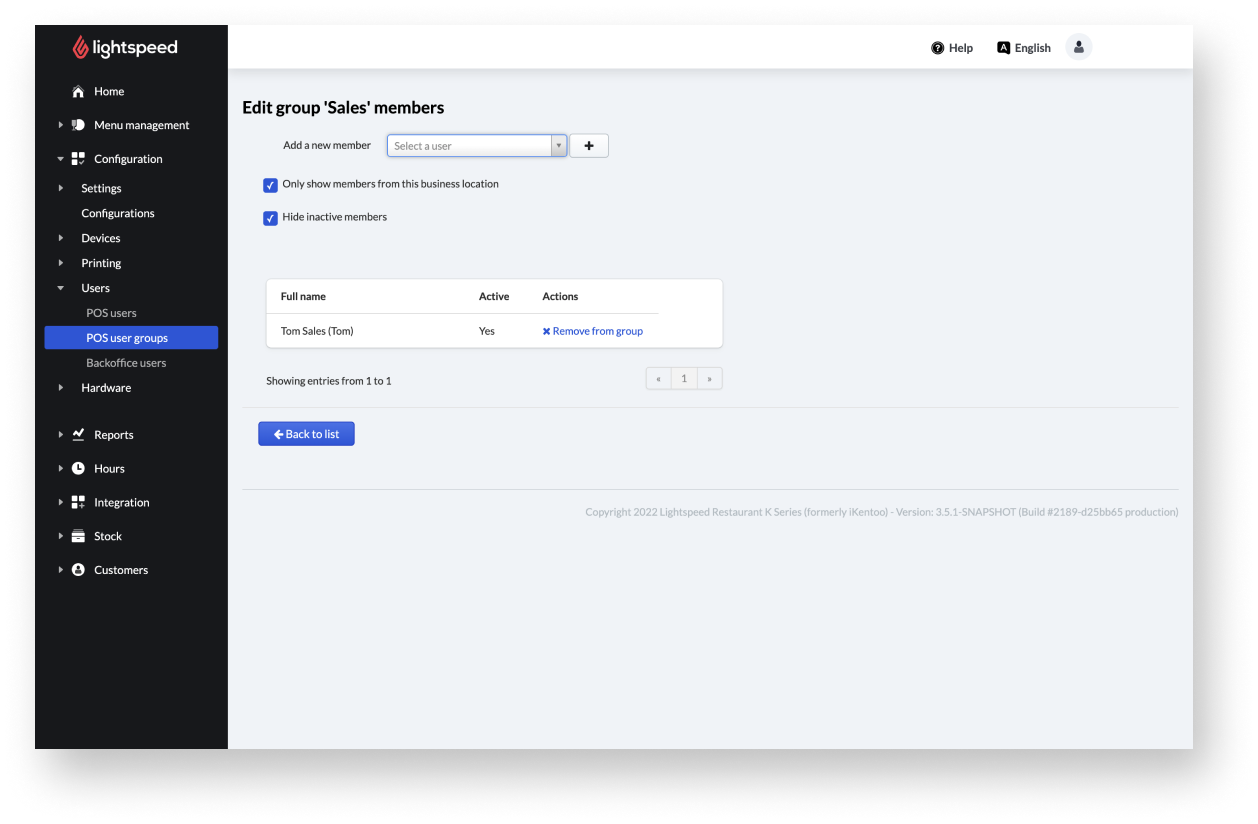
- Select Edit members.
- Add a new member: Enter the name of the POS user via the Select a user field.
- Note: All users created in Configuration > Users > POS usersare available for selection.
- Select the name from the dropdown and select +.
- Enable Only show members from this business location, if applicable.
Note: Your business may have several locations. Users are able to be registered for various locations. If the checkbox is enabled, only users associated with the location selected when logging in in the Back Office will be shown in the “Select a user” field.
- EnableHide inactive members, if applicable.
Note: Once POS users are added to the Back Office, they cannot be deleted, but they can be deactivated. If the checkbox is enabled, only active users are available for selection in the “Select a user” field. See deactivating POS users for further information.
- Select Back to list to save changes.
Comments
0 comments
Please sign in to leave a comment.